This past week has been the absolute busiest week of my life! My darling stepson, Xander, celebrated his 6th birthday this weekend. He picked a Super Mario Brothers theme this year, and guess what... I couldn't find decorations ANYWHERE! (Well I did find some online, but $96 for a plastic table cloth, and enough plates, cups, and napkins for 8 kids seemed a little ridiculous to me!!) So I took the challenge and made the decorations myself! I had plenty of extra time between work, so I got it done.
This pile is made up of: a cardboard box, some toilet paper rolls, a shoe box, some funny shaped cardboard (computer parts came in), some stirofoam pieces, spray paint, and Mario, Bowser, and Peach figurines. With a little LOT of hot glue, I stacked the pices, painted, and decorated it all to become this....
 |
| Stacked and glued it. |
 |
| Painted it. |
 |
| Decorated it a little. |
 |
| Decorated some more. |
 |
| Right side. |
 |
| Back side. |
 |
| Left side. |
I really loved how this turned out! The materials were mostly free, except for about $4 for the spray paint and of course the figurines were a little pricey!
Next up, I needed something to fill the time for the kiddos before we went swimming. I had two activities planned.
Pin the Mustache on Mario
I bought two green, two red, and two white posterboards, poster board markers, adhesive backed Velcro, and a sheet of black foam. I sketched Mario onto two pieces of white poster, colored him, then cut him out. I got a big cardboard box and gkued the red and green posters as the background. Then I hot glued my Mario onto the posters. I added a small strip of Velcro to the area where his mustache should go and cut out a mustache from the black sheet of foam and added Velcro to it.
**** Point of advice: Instead of doing Velcro, use an adhesive like sticky putty so the kiddos can stick it anywhere on him (like Pin the Tail on the Donkey). They kept just feeling for the Velcro on him, so the blindfold was really pointless.****
Chomp Chomp Pinata
This was one tough pinata! I wanted to make sure it wouldn't just fall apart when the first kid hit it, so I made it REALLY tough!! The materials for this pinata were a huge balloon (mine was 3' in diameter), black spray paint, lots of card board, lots of newspaper and old phone book pages (hey, I don't use the phone book, and they work!), flour and water paste (typical paper mache' mix), a coat hanger, and LOTS of hot glue (of course). ****This was a 4 day process, so get ready to dedicate some time!****
I blew up the massive balloon and cut some cardboard strips. I hot glued all of the strips into a sturdy frame around the balloon. I did all of this while watching the finale of Glee (which was terrible, just saying). ****Careful not to touch the balloon with the hot glue.****
I covered the balloon and frame with paper mache'. It was a VERY messy process but kind of relaxing and fun. I let it sit in the sun to dry and harden. I did this for three days in a row, layer upon layer. I left a hole so I could add the candy. Pop the balloon and remove it.
Next I made a hanging mechanism in the hole for candy. I added more cardboard framing with hot glue just like the inside. I poked a hole in the pieces and ran a hanger through then took a strip of cardboard and wrapped around the hanger to stabilize it. ****This pinata was heavy especially after the candy, so make sure your hanging mechanism is secured very well.**** My hubby spray painted the entire thing black while I was at work. When I got home I drew the eyes and face onto scraps of posterboard and hot glued them to the pinata.
 |
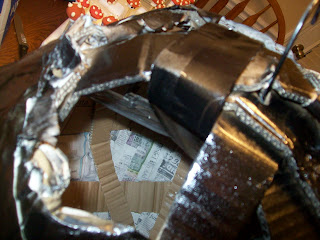
This is the inside of the pinata.
|
 |
It was a hit!! (Haha puns!)
|
This year I didn't make a cake. I got a cake pop baking machine. It is so neat!! Anyway, I decided to get oober creative so I made Mushroom Pops. They are supposed to look like the mushrooms that make Mario bigger. I used two boxes of white cake mix (WAAAYYY too much batter). The whole little bottle of red food coloring I added made it very pink, so I added 4 packets of cherry Kool Aid. It made the red brighter and the cake was cheery flavored (pretty good too!) I used mini marshmallows, black food coloring, and vanilla icing. They were very fun and easy to make and ended up being a great conversation piece and yummy!!
I smushed three mini marshmallows together and put them into a skewer. I cut a cake pop ball in half and put some icing on the bottom to act as an adhesive to the marshmallows. I added the dots on top and drew on the eyes with black food coloring. There ya go, that's all there was to it!
Xander was very happy with his party, and I'm so glad it went so well! He got lots of presents and had great friends there with him! After the party, we spent the rest of the afternoon in the pool. Needless to say, we are all a little sunburnt!


